Animated videos are everywhere right now, and for good reason.
From explainer videos on SaaS homepages to product demos on ecommerce stores to short-form animated content on Instagram and TikTok, animation has become one of the most versatile and effective content formats available to businesses in 2026.
But if you’ve ever tried to create an animated video without knowing the process, it can feel overwhelming fast. Where do you even start? What comes first, the script or the visuals? When does the voiceover happen?
The good news is that the animated video production process follows a clear, repeatable workflow. Once you understand each stage, the whole thing becomes much less intimidating.
This beginner-friendly, step-by-step animated explainer video production guide walks you through every stage of creating professional animated videos, from the initial concept all the way to final delivery and publishing.
What is the Animated Video Production Process?
Animated video production is the process of creating video content entirely through digital design, illustration, and motion rather than physical filming.
Where live-action production requires cameras, locations, actors, and lighting setups, animation builds everything visually from scratch in a computer. Characters, environments, text, and motion are all designed and assembled digitally.
This gives animation significant advantages: total creative control, no physical constraints, easier revisions, and the ability to visualize concepts that would be impossible to film in real life.
The animated video production workflow follows three broad stages: pre-production (planning, scripting, and storyboarding), production (designing and animating), and post-production (editing, sound, and delivery). Understanding what happens at each stage is what separates a smooth production from a chaotic one.
Overview of the Main Stages of Animated Video Production
Every professional animated video, regardless of style or complexity, moves through the same fundamental stages. Understanding the steps in animated video production before you start saves significant time, money, and frustration later.
Pre-production: This is where everything is planned before a single frame is animated. Goal definition, scriptwriting, storyboarding, and design preparation all happen here. Pre-production is where most of the strategic thinking occurs.
Production: This is the animation stage, where storyboards come to life through character movement, motion graphics, transitions, and visual effects. Voiceover recording typically happens in this phase too.
Post-production: The final stage where everything is assembled, edited, polished, and prepared for delivery. Sound design, color adjustments, captions, and export optimization all happen here.
Each stage builds on the last. Rushing pre-production creates expensive problems in production. Skipping post-production leaves a video that looks unfinished. Respecting the workflow is what produces professional-quality animation consistently.
Step 1: Define the Goal and Audience
Because a video without a clear goal is a creative exercise, not a marketing asset.
Before writing a single word of script or designing a single frame, the most important question to answer is: what do we need this video to accomplish and for whom?
Defining your goal:
- Are you building brand awareness with a cold audience?
- Explaining a complex product to potential buyers?
- Onboarding new customers or training employees?
- Supporting a social media campaign or a landing page?
Each goal demands a different approach to content, length, tone, and distribution.
Understanding your audience: A video aimed at technical professionals needs different language, pacing, and visual style than one aimed at first-time buyers. Knowing who you’re speaking to shapes every creative decision that follows.
Determine the desired action: What should the viewer do after watching? Subscribe, purchase, book a call, share the video? The call-to-action should be clear in your mind before the script exists.
Audience-focused storytelling starts here, at the goal-setting stage, not at the animation stage.
Step 2: Animation Script Writing Tips
The script is the foundation of everything. Every scene, every animation, every voiceover line grows directly from it. A weak script produces a weak video no matter how beautiful the animation looks.
Here are the most important animation script writing tips for beginners and experienced creators alike.
Start with a strong hook. The first five seconds of any animated video determine whether the viewer stays or leaves. Open with a bold question, a surprising fact, or an immediately relatable problem.
Follow a clear structure:
- Hook: grab attention immediately
- Problem: identify the pain point the viewer recognizes
- Solution: introduce your product, service, or message
- Proof: a quick stat, example, or testimonial
- CTA: one clear, specific action
Keep language conversational. Read your script out loud. If any sentence sounds stiff or unnatural when spoken, rewrite it. Animation scripts are performed, not read silently.
Match tone to your audience. A playful B2C brand and a professional B2B software company need completely different script voices. Tone should be decided at the scripting stage, not adjusted during animation.
Keep it concise. The sweet spot for most animated explainer videos is 130 to 150 words per minute. A 60-second video needs roughly 130 to 160 words total. Every line should earn its place.
Resist the temptation to include every feature, benefit, and detail you want to communicate. One video, one message, delivered well, always outperforms a video trying to say everything.
Step 3: Storyboarding for Animated Videos
Storyboarding for animated videos is the process of creating a visual plan for every scene before animation begins. Think of it as a comic strip version of your final video, rough sketches showing what will appear on screen at each moment in the script.
Storyboards serve several critical functions in the production workflow.
Visual planning before expensive work begins. Animation takes significant time and resources. A storyboard lets everyone see and agree on the visual direction before a single frame is animated. Changes at the storyboard stage cost minutes. Changes at the animation stage cost hours.
Scene sequencing and shot organization. Storyboards map out how scenes flow from one to the next. They show camera angles, character positions, background elements, and how on-screen text or graphics will appear relative to the voiceover timing.
Client and team communication. For professional productions, storyboards are the bridge between the written script and the finished video. They give clients a tangible preview to review and approve, reducing misunderstandings and revision cycles dramatically.
Revision efficiency. It’s far easier to rearrange, cut, or redesign scenes on a storyboard than to reanimate sequences that aren’t working. Storyboarding catches structural problems early, before they become expensive.
Storyboards don’t need to be polished illustrations. Clear rough sketches with annotations are completely sufficient for effective storyboarding, especially for beginners working on internal productions.
Step 4: Designing Visual Style and Assets
Once the script is approved and the storyboard is complete, the design stage begins. This is where the visual world of your animated video takes shape before a single frame is animated.
Choose your animation style first. The style you select shapes everything from production time to audience perception.
Common animation styles include:
- 2D character animation: illustrated characters with fluid movement, warm and approachable
- Motion graphics: animated text, shapes, and icons, clean and modern, ideal for data-heavy or technical content
- Whiteboard animation: hand-drawn style illustration, engaging and educational in tone
- 3D animation: dimensional, realistic, and high-production, best for product visualization
- Mixed media: combining elements from multiple styles
Develop brand-consistent visuals. Character design, color palette, typography, and icon style should all align with your existing brand identity. Visual consistency across your animated content builds brand recognition over time.
Create all assets before animation begins. Characters, backgrounds, icons, and graphic elements should be fully designed and organized before the animation stage starts. Starting animation with incomplete assets creates inefficiency and inconsistency in the final product.
Step 5: Voiceover Process for Animation
The voiceover process for animation typically happens after script approval and before or alongside animation production. Getting the voiceover right early allows animators to time movements and transitions precisely to the spoken word.
Recording narration after script approval: The script must be locked before recording begins. Changes to the script after the voiceover is recorded require expensive re-recording sessions that delay the entire production.
Choosing the right voice: Tone, pace, accent, gender, and energy level should all align with your brand personality and audience expectations. A playful B2C brand needs a different voice than a professional financial services company. Audition multiple options before committing.
Synchronizing voiceovers with visuals: Animators use the audio track as their timing guide. Scene transitions, character movements, and on-screen text appearances are all choreographed to match the rhythm and emphasis of the spoken narration.
Audio quality is non-negotiable: A beautifully animated video with muffled, echoey, or poorly recorded voiceover immediately undermines the production’s professionalism. Record in a quiet environment with a quality microphone, or use a professional voiceover service.
Step 6: Animation Production Begins
This is where the storyboard comes to life. The animation stage is the most time-intensive part of the entire process, and understanding how animated videos are made at this stage helps set realistic expectations.
Animating scenes and movements: Animators take the approved storyboard frames and bring each scene to life. Characters move, objects transition, text appears, and scenes sequence according to the timing established in the storyboard and voiceover.
Timing and transitions: Professional animation is about more than just making things move. It’s about the rhythm of movement, how fast a character enters, how smoothly a scene transitions, when a key phrase appears on screen relative to when it’s spoken. These timing decisions drive the viewer’s attention and emotional experience.
Motion graphics and character animation basics: Motion graphics animate flat design elements like icons, charts, and text. Character animation brings illustrated figures to life with movement that feels natural and expressive. Most marketing animations combine both.
Collaboration between designers and animators: The design assets created in Step 4 are handed off to animators who build movement within the established visual framework. Clear communication and organized asset files make this handoff smooth. Disorganized assets create delays and inconsistencies.
The animation stage is where experience and attention to detail make the biggest visible difference between amateur and professional production quality.
Motion Graphics Production Workflow Explained
Motion graphics are animated graphic design elements: text that moves, icons that bounce, data visualizations that build on screen, and shapes that transition smoothly between scenes.
They’re distinct from character animation but equally important in the motion graphics production workflow for most marketing and explainer videos.
How motion graphics improve storytelling: Abstract concepts like financial processes, software features, or statistical data are difficult to communicate with characters alone. Motion graphics make invisible ideas visible, turning a complex data point into a clean animated chart, or a multi-step process into a flowing visual sequence.
Common uses in marketing animation:
- Animated statistics and data visualization
- Process diagrams and numbered steps
- Lower-thirds showing speaker names or key points
- Animated logos and brand reveals
- Transitional elements between scenes
Motion graphics are particularly effective for B2B brands, tech companies, and any business communicating complex information to professional audiences who respond well to clean, visual data presentation.
Step 7: Sound Design and Background Music
Sound design is one of the most underrated elements of animated video production. Most viewers can’t consciously identify good sound design, but they immediately notice its absence.
Adding music and sound effects: Background music sets the emotional tone of the video from the first frame. Sound effects, a subtle whoosh when text slides in, a soft chime when a key point appears, add dimensionality and professionalism to the visual experience.
Creating emotional tone and engagement: Music tempo, instrumentation, and emotional quality directly affect how the viewer feels watching the video. An upbeat, energetic track creates momentum. A warm, understated score builds trust. Choose music intentionally, not as an afterthought.
Balancing audio levels: The voiceover must be clearly audible above the background music at all times. Music that competes with narration frustrates viewers and reduces information retention. Standard practice is to mix music at 15 to 20 percent of the voiceover volume during spoken sections.
Professional sound design matters: Even small, well-chosen sound effects can elevate a production significantly. Conversely, jarring, mismatched, or royalty-violated music can damage both the viewer experience and the brand’s legal standing.
Step 8: Post Production for Animated Videos
Post production for animated videos is the final stage where all elements, animation, voiceover, music, sound effects, captions, and branding, are assembled into the polished, finished product.
Final editing and polishing: The editor reviews the full assembled video for pacing, timing, scene flow, and consistency. Cuts that feel too long get tightened. Transitions that feel jarring get smoothed. The video is refined until every element feels intentional and cohesive.
Color adjustments and visual consistency: Color grading ensures that all scenes share a consistent visual tone. If different scenes were animated at different times or by different team members, color adjustments unify the visual experience.
Captions and branding elements: Captions are added for accessibility and silent viewing. The company logo, brand colors, and any required legal or contact information are confirmed and positioned correctly.
Rendering and exporting: The finished video is rendered in the appropriate formats for each intended platform. MP4 with H.264 encoding works broadly. Specific platforms have specific requirements: vertical 9:16 for TikTok and Reels, square 1:1 for Instagram feed, widescreen 16:9 for YouTube and websites.
Quality checks before publishing: Watch the final export on multiple devices, desktop, tablet, and mobile, before publishing. Check that audio syncs correctly with visuals, captions display properly, and the video loads at acceptable speed.
Complete Workflow for Animated Video Production in 2026
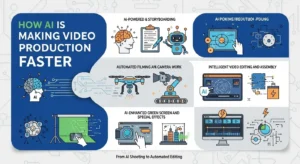
The complete workflow for animated video production in 2026 looks different from even two years ago, primarily because of how AI tools and cloud collaboration have changed what’s possible and at what speed.
AI-assisted production tools now handle tasks that previously required hours of manual work: automatic lip-sync for character animation, AI-generated background assets, automated captioning, and smart scene transitions. These tools don’t replace creative judgment, but they dramatically reduce repetitive production tasks.
Cloud-based collaboration allows distributed teams to work on the same project simultaneously, with designers, animators, sound designers, and clients reviewing and approving work in real time regardless of location.
Short-form content optimization is now a standard part of the workflow. Productions routinely create multiple exports of the same core video: a 60-second full version, a 30-second social cut, and a 15-second teaser, all from the same production process.
Scalable content production through modular animation systems, where character rigs, background assets, and graphic templates can be reused across multiple videos, is making it possible for businesses to maintain consistent, high-quality animated content libraries at reasonable cost.
How to Create Animated Explainer Videos from Start to Finish
Here’s how to create animated explainer videos from start to finish in a clear, organized sequence.
1. Planning and Scripting
Define your goal, identify your audience, and research the message your video needs to communicate. Write a tight script following the hook, problem, solution, proof, CTA structure. Lock the script before moving forward, because every subsequent stage builds on it.
2. Designing and Storyboarding
Create rough storyboard frames for every scene. Develop your visual style including character design, color palette, and typography. Build all design assets and organize them clearly before handing off to animation. Get client or stakeholder approval on the visual direction at this stage, not after animation is complete.
3. Animation and Editing
Record voiceover and use it as the timing foundation for animation. Animate all scenes according to the approved storyboard. Add motion graphics, transitions, and visual effects. Assemble all animated scenes in the editing timeline with voiceover, music, and sound effects. Review pacing and make final adjustments.
4. Publishing and Optimization
Export in the correct format for each platform. Add captions and video metadata including optimized title, description, and tags. Publish strategically with platform-appropriate captions and calls-to-action. Track performance metrics from day one and use the data to improve future productions.
Common Mistakes to Avoid in Animated Video Production
These mistakes appear consistently, especially in early productions, and all of them are avoidable.
- Overcomplicated scripts. Trying to communicate too much in one video dilutes the message and loses the audience. One video, one message.
- Weak storytelling and pacing. Animation that looks great but moves through a directionless story fails to engage or convert. Story structure matters more than visual polish.
- Inconsistent branding. Characters, colors, and fonts that shift between scenes create a disjointed, unprofessional impression.
- Poor audio quality. A muffled voiceover or music that drowns out narration undermines the entire production. Audio is as important as visuals.
- Ignoring audience attention spans. Most marketing animated videos should run between 60 and 90 seconds. Every second beyond that requires the content to actively earn continued attention.
Catching these issues at the script and storyboard stage prevents expensive fixes during or after animation.
Tips for Beginners Learning Animation Workflow
The animation workflow for beginners becomes manageable quickly when you approach it the right way.
- Start with simple projects. A 30-second motion graphics video with text and icons is a better first project than a complex character animation. Build foundational skills before tackling advanced techniques.
- Focus on storytelling before effects. A clear, well-structured story with basic animation outperforms visually complex animation with no narrative direction. Get the fundamentals right first.
- Use beginner-friendly tools. Platforms like Canva, Adobe Express, Vyond, and Animaker provide templates and simple interfaces that let beginners create decent animated videos without advanced design skills.
- Practice pacing and timing. The difference between amateur and professional animation often comes down to timing. Study videos you admire and pay attention to how quickly scenes move and how transitions feel.
- Learn basic sound design. Even simple background music and subtle sound effects dramatically elevate the perceived quality of beginner animations. Free music libraries like Pixabay and Mixkit are great starting points.
Every professional animator started exactly where you are. The workflow becomes intuitive with practice.
Conclusion
The animated video production process follows a clear path: define your goal, write a strong script, storyboard your scenes, design your visuals, record your voiceover, animate your content, add sound, polish in post-production, and publish with optimization.
Each stage builds on the one before it. Rushing any step creates problems downstream. Respecting the workflow is what produces professional-quality animation consistently, regardless of budget or team size.
For beginners, the most important thing to remember is that creativity and clear storytelling matter more than technical perfection. Start simple, focus on your audience, and let the message drive every creative decision.
Animated video is one of the most powerful communication and marketing tools available in 2026. The businesses using it well are seeing real results in engagement, brand awareness, and conversion.
Start your first animated video project using this step-by-step guide, and build from there.
FAQs
1. What are the main stages of animated video production?
The main stages are pre-production (goal setting, scripting, storyboarding, design), production (animation and voiceover), and post-production (editing, sound design, and export).
2. How are animated explainer videos made?
They’re created through a sequential workflow: writing the script, storyboarding scenes, designing visual assets, recording voiceover, animating the content, adding sound, and finalizing in post-production.
3. Why is storyboarding important in animation?
Storyboarding visualizes every scene before expensive animation work begins, ensuring everyone agrees on the creative direction and reducing costly revisions later in production.
4. What is the role of post-production in animated videos?
Post-production assembles all elements into the final video, including editing for pacing, adding captions and branding, balancing audio, color grading for visual consistency, and exporting in platform-appropriate formats.
5. Can beginners learn animated video production easily?
Yes. Starting with simple projects, beginner-friendly tools, and a focus on storytelling over complex effects makes the learning curve manageable. Skills build naturally with each project.