You’ve got an idea for a video. Maybe it’s a product demo, a YouTube channel, or a behind-the-scenes clip for your brand. You grab your phone, hit record, and… it looks nothing like what you imagined.
Don’t worry. Every great video creator started exactly where you are right now.
Video content is more important than ever. According to Cisco, video accounts for over 82% of all internet traffic worldwide. Brands, creators, and businesses that use video are growing faster than those that don’t.
The good news? Creating high-quality videos doesn’t require a Hollywood budget or a film degree. It requires the right knowledge, a bit of practice, and a willingness to start.
This video production guide for beginners will walk you through the entire process, from your very first idea to a polished final video. Step by step. No jargon. Let’s go.
What is Video Production?
Let’s start with the basics. What does video production actually mean?
Video production is the process of creating a video from start to finish. It covers everything: planning your concept, filming the footage, and editing it into a final product.
There are three main stages in video production:
Pre-production. This is the planning phase. You figure out what you want to make, who it’s for, and how you’ll make it. Scripts, schedules, and storyboards all happen here.
Production. This is the filming phase. You set up your camera, lights, and audio, then actually capture the footage.
Post-production. This is the editing phase. You cut the footage, add music and graphics, color correct the image, and package everything into a finished video.
Each stage is equally important. Skip one and the whole thing falls apart.
Overview of the Video Production Process
What does the full video production process look like from start to finish?
Here’s a simple breakdown of the steps in the video production process:
- Define your goal. What is this video for? Who will watch it?
- Write a script or outline. Know what you’re going to say before you press record.
- Plan your shoot. Location, props, lighting, schedule. Sort it out in advance.
- Film your footage. Set up your camera and capture everything you need.
- Edit your footage. Cut, arrange, and polish your clips into a finished video.
- Publish and promote. Share it on the right platforms and get it in front of your audience.
Following this workflow keeps you organized and saves you a lot of headaches. Many beginners skip straight to filming and then wonder why their videos feel scattered. The structure is what separates good videos from great ones.
Pre-Production Planning for Video
Why is pre-production planning so important for video?
Because filming without a plan is like driving somewhere new without GPS. You might get there eventually, but you’ll waste a lot of time and probably make a few wrong turns.
Here’s what solid pre-production planning for video looks like:
Define your goal and audience. Are you educating, entertaining, or selling? Who is watching? A how-to video for a 55-year-old business owner looks different from a product reveal for Gen Z.
Write your script or outline. You don’t need to write every single word, but know your key points. Scripts prevent rambling and save time in editing.
Create a simple storyboard. A storyboard is just a sketch of your shots in order. It doesn’t need to be fancy. Even stick figures work. It helps you visualize the video before you film a single second.
Plan your location, props, and schedule. Scout your filming spot in advance. Check the lighting at the time of day you plan to shoot. Gather any props or products you need.
Good preparation makes filming faster, smoother, and a whole lot less stressful.
Filming Techniques for Beginners
What filming techniques should beginners focus on first?
You don’t need to master everything at once. Start with these core beginner video production tips and you’ll be ahead of most people:
Stabilize your camera. Shaky footage is the number one sign of an amateur video. Use a tripod whenever possible. If you’re shooting handheld, keep your elbows tucked in close to your body and move slowly.
Frame your shots well. Use the rule of thirds. Imagine your frame divided into a 3×3 grid. Place your subject at one of the intersecting points rather than dead center. It looks more natural and visually interesting.
Vary your shots. Don’t film everything from one angle. Mix wide shots, medium shots, and close-ups. A wide shot establishes the scene. A close-up shows detail. Varying your shots keeps the viewer’s eye engaged.
Keep your subject in focus. If using a smartphone, tap on your subject to lock focus before recording. On a camera, use autofocus or manually set your focal point.
Avoid common mistakes. Don’t zoom while filming (it looks cheap). Don’t shoot with a bright window behind your subject. Don’t start recording and then immediately start talking. Give yourself a few seconds of buffer footage at the start and end of every clip.
Lighting Setup for Video
How important is lighting, and what should beginners know?
Lighting is everything. Bad lighting can make even the most expensive camera footage look terrible. Good lighting can make a smartphone video look professional.
Here’s the basics of lighting setup for video:
Natural light is your best free resource. Filming near a large window on an overcast day gives you soft, even light that’s incredibly flattering. Direct sunlight is harsh and creates unflattering shadows. Overcast light is like nature’s softbox.
The three-point lighting setup is a classic for a reason. It uses three lights:
- Key light: your main light source, positioned at a 45-degree angle to your subject
- Fill light: a softer light on the opposite side to reduce shadows
- Back light: placed behind the subject to separate them from the background
Avoid mixed light sources. Mixing warm and cool light creates an ugly, uneven look. Stick to one color temperature.
Watch for harsh shadows. If shadows are falling across your subject’s face, move the light further away or add a diffuser (even a white sheet works).
You don’t need expensive lighting gear to start. A ring light under $50 from Amazon can dramatically improve your video quality overnight.
Audio Quality in Video Production
Does audio really matter as much as the visuals?
Yes. Actually, more. Viewers will forgive slightly shaky footage or imperfect color. They will immediately click away if the audio is hard to listen to. Poor audio is one of the fastest ways to lose an audience.
Here’s what to focus on for audio quality in video production:
Get a decent microphone. The built-in microphone on your camera or smartphone is almost never good enough. A lavalier (clip-on) mic runs $20 to $50 and makes an enormous difference. A USB condenser microphone is great for sit-down style videos.
Record in a quiet environment. Air conditioning hum, traffic noise, and echoing rooms are your enemies. Film in a carpeted room with soft furnishings to absorb sound naturally.
Monitor your audio levels. If possible, use headphones while recording so you can hear any background noise in real time.
Keep your mic close to your subject. The closer the mic, the better the signal-to-noise ratio. Even a few extra inches of distance makes audio noticeably worse.
Video Editing Basics
What do beginners need to know about video editing?
Editing is where your raw footage becomes a real video. It sounds intimidating, but the video editing basics are not as complicated as they look.
Cut and trim your clips. Remove anything that’s boring, off-topic, or filled with “umms” and “uhhs.” Keep the pace tight. If a scene doesn’t add value, cut it.
Arrange your clips in order. Build a clear beginning, middle, and end. Even a simple product video should have a logical flow.
Add music. Background music sets the mood and fills awkward silences. Use royalty-free music from sites like Artlist, Epidemic Sound, or YouTube Audio Library to avoid copyright issues.
Use text and titles sparingly. A lower-third title (small text at the bottom of screen) to introduce a person or topic is clean and professional. Avoid flashy text animations unless they fit your brand.
Color correct your footage. Most editing software has basic color correction tools. Adjust brightness, contrast, and white balance to make your footage look natural and consistent.
Keep transitions simple. Stick to cuts and simple fades. Wild transitions look dated and distracting.
Popular beginner-friendly editing software includes DaVinci Resolve (free), CapCut (free, great for mobile), and Adobe Premiere Rush.
How to Create Professional Videos on a Low Budget
Can you really make professional-looking videos without spending a fortune?
One hundred percent yes. Here’s how to create professional videos on a low budget:
Start with your smartphone. Modern iPhones and Android phones shoot in 4K. The camera in your pocket is genuinely capable of professional results with the right technique.
Invest strategically in audio first. A $30 lavalier mic will improve your videos more than a $500 camera upgrade. Sound is that important.
Build a DIY lighting setup. Two large white foam boards from a dollar store make excellent light reflectors. A window plus a foam board reflector is a real lighting setup used by real professionals.
Use free editing software. DaVinci Resolve is free and used by Hollywood editors. CapCut is free and powerful for social media content. iMovie comes free with every Mac.
Focus on creativity over gear. A clever concept, good storytelling, and clear audio will beat expensive equipment every time. Viewers connect with authenticity, not production budgets.
The best camera is the one you already have. Start there.
Beginner Guide to Filming and Editing High-Quality Videos
How do you bring filming and editing together as a beginner?
The key is keeping your workflow simple and building consistency over time. Here’s a beginner guide to filming and editing high-quality videos in a practical sense:
Film more than you think you need. Extra footage gives you options in editing. Running out of shots mid-edit is frustrating.
Keep your editing timeline organized. Label your clips, color code different types of footage (interviews, b-roll, graphics), and work from start to finish rather than jumping around.
Match your edit to the energy of the content. A relaxed tutorial should have slow, comfortable cuts. A product hype video should be punchy and fast.
Review your edit before exporting. Watch it through at least once with fresh eyes. Better yet, let someone else watch it and ask for honest feedback.
Publish consistently. One video per week beats one perfect video per month. Consistency builds skill faster than anything else.
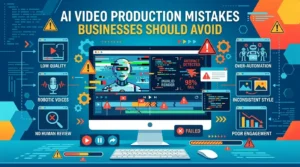
Common Mistakes to Avoid
What mistakes do most beginners make in video production?
Almost everyone makes these errors early on. Knowing them in advance saves you a lot of frustration.
- Poor planning. Winging it always shows. Even 20 minutes of pre-production planning saves hours of editing later.
- Shaky footage. Use a tripod, a gimbal, or a stable surface. Always.
- Bad lighting. Dark, shadowy footage looks unprofessional no matter how good your camera is.
- Poor audio quality. If viewers struggle to hear you clearly, they leave. No exceptions.
- Over-editing. Too many effects, transitions, and text overlays make a video feel chaotic. Less is almost always more.
- No clear goal. If you don’t know what action you want the viewer to take after watching, they won’t know either. Define the purpose before you press record.
Tips to Improve Your Video Production Skills
How do you get better at making videos over time?
The honest answer is: practice. But here’s how to practice smart:
- Film regularly. Even if it’s just for yourself. Every video you make teaches you something.
- Study creators you admire. Watch videos you love and ask yourself why they work. What’s the framing like? How is the audio? How are the cuts timed?
- Experiment with different formats. Try a talking head video, then a product demo, then a vlog-style video. Range builds skill.
- Analyze your own performance. If you’re posting publicly, watch your analytics. Low watch time usually means your hook isn’t strong enough. High drop-off mid-video means pacing is an issue.
- Don’t wait for perfect. Your tenth video will be better than your first. Your hundredth will be better than your tenth. The only way to improve is to make things.
Conclusion
Video production might seem overwhelming at first, but it’s really just a series of small, learnable steps. Plan your content, film with intention, edit with clarity, and publish with consistency.
Anyone can learn this. You don’t need expensive gear, a studio, or a film background. You need curiosity, practice, and the willingness to start before you feel ready.
Start with one video. Keep it simple. Watch it back, see what you can improve, and make the next one better. That’s the whole game.
The world is watching more video than ever before. The question is, when will they start watching yours?
FAQs
1. What are the basic steps in video production?
Video production has three main stages: pre-production (planning, scripting, storyboarding), production (filming, lighting, audio recording), and post-production (editing, color correction, music, and exporting). Following these steps in order helps you create a structured, professional final product.
2. How can beginners create high-quality videos?
Focus on three things first: good lighting, clear audio, and steady footage. Natural window light, a basic lavalier microphone, and a tripod are all you need to get started. After that, a simple script and clean editing will take you a long way.
3. What equipment do I need to start video production?
At minimum: a camera (your smartphone is fine to start), a tripod, a basic microphone, and a light source. As you grow, you can invest in a dedicated camera, better audio gear, and lighting equipment. But none of that is required on day one.
4. How important is editing in video production?
Editing is where your raw footage becomes a real video. It shapes the pacing, removes mistakes, adds music and graphics, and controls how the viewer feels throughout. Even average footage can look polished with thoughtful editing. It’s one of the most important skills you can develop as a video creator.
5. Can I create professional videos on a low budget?
Absolutely. Many successful YouTube channels and brand videos are shot entirely on smartphones with affordable microphones and free editing software like DaVinci Resolve. The biggest upgrades you can make cost almost nothing: better lighting, quieter recording environments, and more careful planning before you film.